Baked Chicken Breast: The Juiciest, Easiest Recipe Ever!
Baked chicken breast is a meal that works for almost anyone. It’s easy to make, healthy, and super tasty. You don’t need fancy tools—just a baking pan, some seasoning, and an oven. I’ve made this recipe many times, and it always comes out juicy and full of flavor.
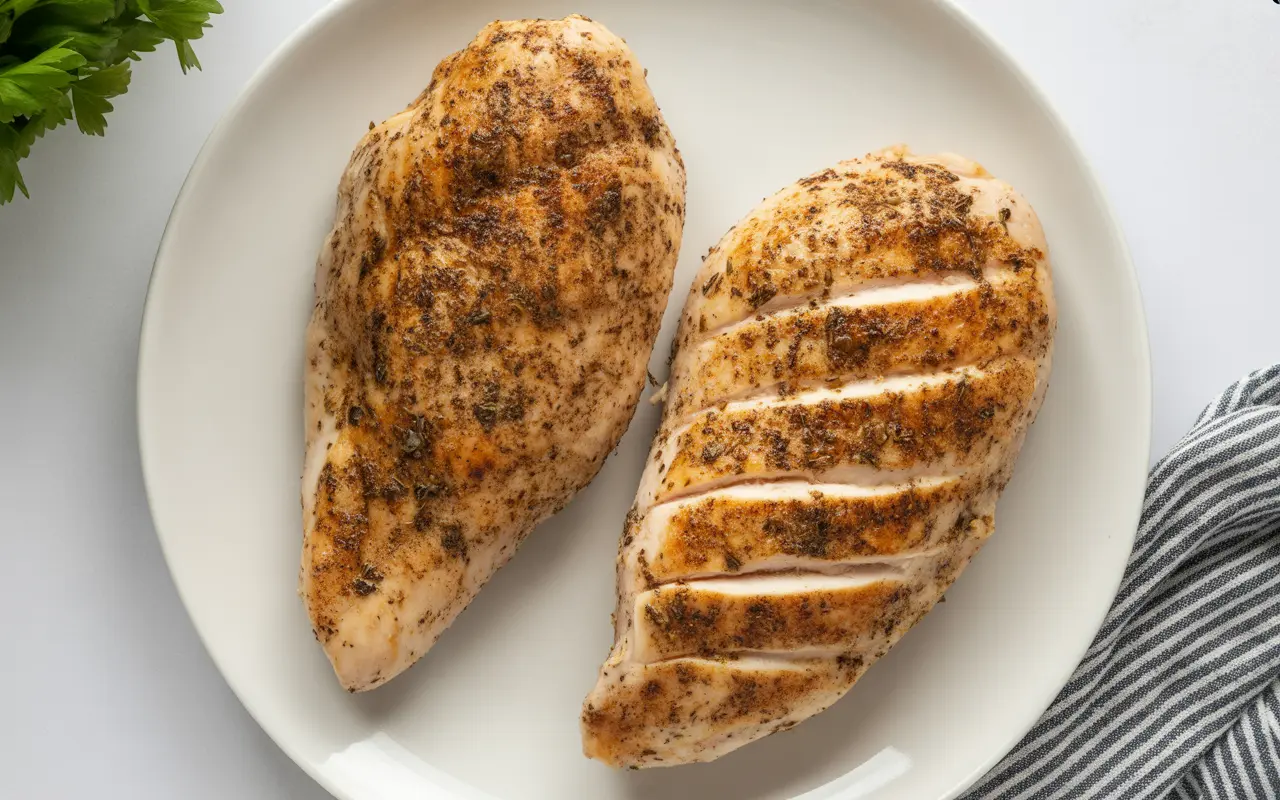
One great thing about this dish is that it’s very flexible. You can eat it with rice, pasta, salad, or even in a sandwich. It’s perfect for lunch or dinner. And if you don’t like dry chicken (I don’t either), this recipe will surprise you. The chicken stays moist on the inside and a little crisp on the edges.
Also, you don’t need to stand in the kitchen for long. While it bakes, you can do other things—like clean up or relax. I often bake a few pieces at once and save them for later. It makes meal prep quick and stress-free.
Who This Recipe is Perfect For
This baked chicken breast is great for busy families. If you’re short on time, you can still make a healthy dinner fast. Even kids like it because it’s soft and not too spicy. Parents like it because it’s easy and good for the whole family.
If you’re someone who works out or eats clean, this recipe helps too. Chicken breast has lots of protein and not much fat, so it keeps you strong without making you feel heavy. I used this recipe when I was trying to eat healthier, and it helped me stay on track.
It’s also a smart choice if you’re just tired of dry chicken. I used to cook chicken that was too dry or had no flavor. But after learning this method, my chicken turned out great every time. If I can do it, you can too!
Why Baked Chicken Breast is a Must-Try Meal
Benefits of Baking Chicken
Baking chicken breast is one of the healthiest ways to cook it. You don’t need much oil, and that means less fat and fewer calories. Plus, when you bake it the right way, it keeps its juices, so the meat stays soft and full of flavor. I’ve found baking much better than frying because it doesn’t make the chicken greasy or heavy.
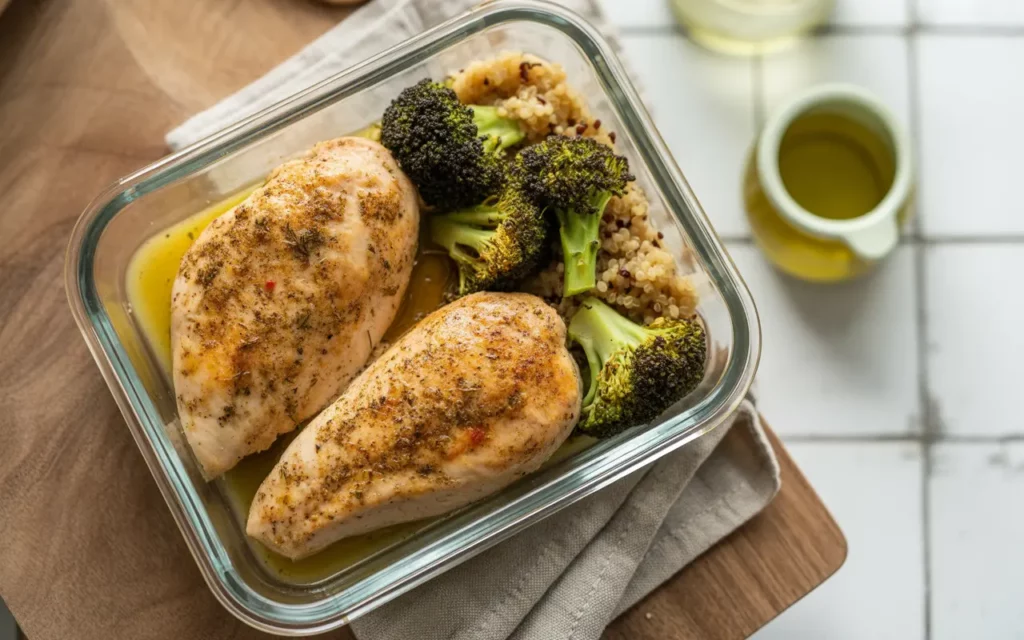
Another big win? It’s perfect for meal prep. I like to bake 4–5 chicken breasts on Sunday, then use them all week—sliced in wraps, on salads, or with rice. It saves time and helps me eat better without feeling bored. This is a smart idea for people who want high-protein meals but are too busy to cook every day.
Baked chicken is also a great choice if you care about nutrition. It holds onto more vitamins and minerals than frying or boiling. According to the USDA, baked skinless chicken breast is low in fat, high in protein, and packed with B vitamins. That’s why athletes, fitness fans, and families all love it.
Common Problems and How to Avoid Them
One common problem with oven baked chicken is that it can get dry. This often happens when it’s cooked too long or at the wrong temperature. I used to do this all the time until I learned to check the internal temperature—165°F (74°C) is the sweet spot. A meat thermometer changed the game for me. It’s a small tool, but it keeps the chicken juicy every time.
Another issue is uneven cooking. If one side is thick and the other is thin, the thin part gets overcooked. To fix this, I now use a meat mallet to pound the chicken flat before baking. It takes just a minute and makes a big difference in how evenly it cooks.
Some people also say baked chicken tastes bland. That’s usually from skipping the seasoning. I always mix simple spices like garlic powder, paprika, salt, and pepper. Sometimes I add a bit of lemon or olive oil too. Just a few easy steps can turn plain chicken into something tasty and exciting.
Ingredients You’ll Need for Perfect Baked Chicken Breast

To make a great baked chicken breast, you don’t need anything fancy. You just need a few simple, everyday ingredients. Start with boneless, skinless chicken breasts—they cook fast and stay lean. For seasoning, I always use olive oil, garlic powder, paprika, salt, and pepper. These add great flavor and help the outside get a little crisp while the inside stays juicy.
This is one of my favorite simple chicken breast recipes because it’s easy to remember and easy to make. Olive oil helps lock in moisture, and garlic powder gives it that bold, savory taste. Paprika adds a little color and warmth. If you’re just learning to cook, this combo is a great place to start. It’s hard to mess up, and it always tastes good.
Optional Add-ins for Flavor Boost
If you want to change things up, you can try extra flavors that go really well with baked chicken. Sometimes I use a bit of lemon juice for a fresh, zesty taste. Other times I mix in Italian herbs like oregano or thyme. I’ve also used a mix of honey and mustard when I want something sweet and tangy.
Another great way to add flavor is to use a marinade. You can make one with olive oil, vinegar or citrus juice, and your favorite herbs. Let the chicken sit in the marinade for at least 30 minutes—or overnight if you have time. This not only adds taste but also helps the meat stay soft and tender. It’s a simple trick that really works.
Step-by-Step Instructions for the Best Baked Chicken Breast
Step 1 – Preheat Your Oven
Before you do anything else, turn on your oven and preheat it to 400°F (204°C). This is the best temperature to cook chicken breast quickly while keeping it moist. A hot oven helps seal the juices inside the meat, which gives you that juicy chicken breast you want. If the oven isn’t hot enough, the chicken may dry out while it cooks too long. I used to skip this step, and my chicken was never as tender—now I never forget.
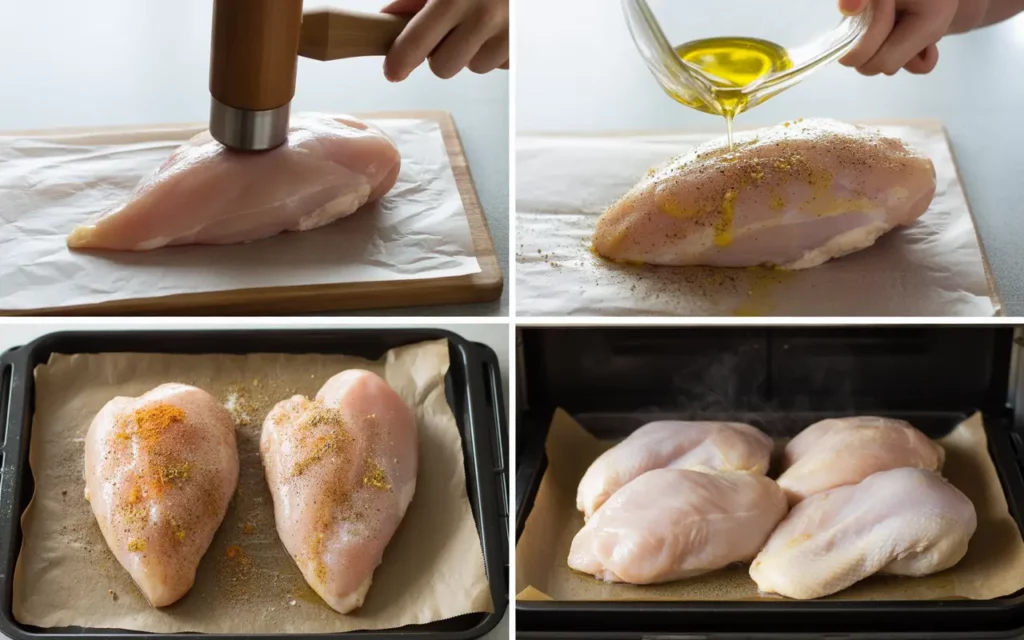
Step 2 – Pound the Chicken for Even Cooking
Most chicken breasts are thicker on one side and thinner on the other. That makes it hard to cook them evenly. Use a meat mallet, rolling pin, or even the bottom of a pan to gently pound the chicken until it’s about the same thickness all over—about ½ inch is perfect. This helps it cook evenly so one side doesn’t dry out. I learned this trick after overcooking too many thin ends—now I always flatten my chicken.
Step 3 – Season It Right
Drizzle a little olive oil over each piece of chicken to help it stay moist and hold the seasoning. Then rub in a mix of salt, pepper, garlic powder, and paprika. This gives the chicken flavor without making it too spicy. You can add other herbs or spices if you like, but even this simple blend tastes great. I use my hands to rub everything in so the chicken is coated evenly.
Step 4 – Bake at the Right Temperature
Place your chicken breasts on a baking tray or dish, making sure they’re not touching. Put them in the middle rack of the oven and bake for 18 to 22 minutes, depending on their size. The best way to check if it’s done is with a food thermometer. The internal temperature for chicken breast should reach 165°F (74°C). If you don’t have a thermometer yet, I highly recommend getting one—it changed how I cook forever.
Step 5 – Let It Rest Before Slicing
Once your chicken is out of the oven, don’t cut it right away. Let it sit for about 5 to 10 minutes. This gives the juices time to settle inside the meat, so they don’t all run out when you slice it. It’s a small step that makes a big difference. I used to skip resting, and the chicken always seemed drier—now I always wait, and the result is much better.
How Long to Bake Chicken Breast at Different Temperatures
Cooking Time by Oven Temperature
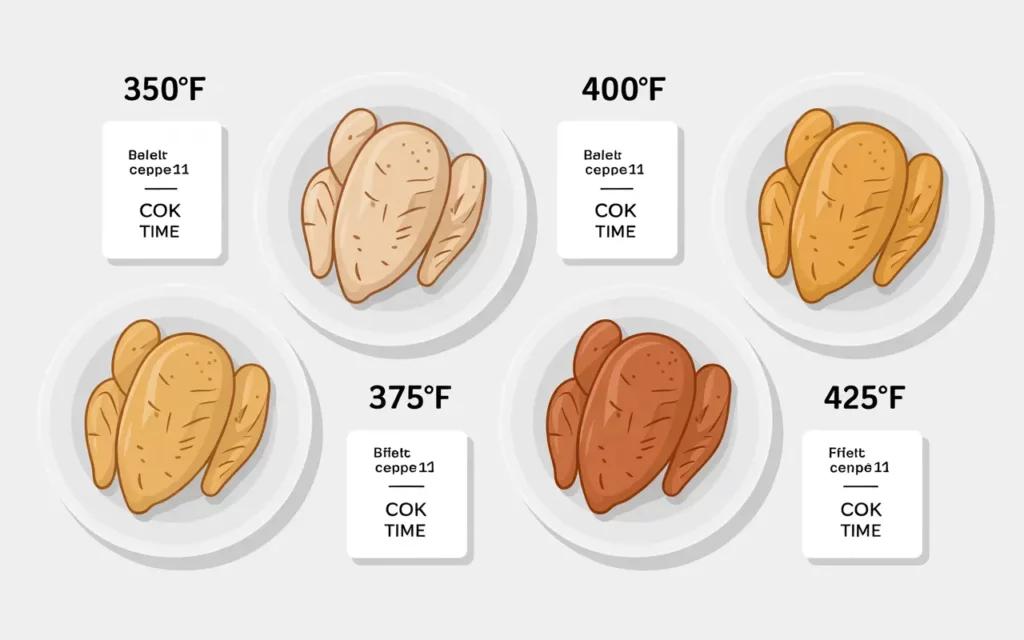
The oven temperature makes a big difference in how your chicken turns out. A lower heat takes longer and may dry the meat. A higher heat cooks faster and keeps the inside juicy—if you don’t overcook it.
I usually bake at 400°F because it gives me juicy chicken without a long wait. But if your chicken is thick or you’re baking with other foods, you might want to use a lower setting.
Here’s a quick table that shows how long to bake chicken breasts at different oven temperatures:
| Oven Temperature | Bake Time | Notes |
| 350°F (175°C) | 25–30 minutes | Gentle cooking, may dry out if overcooked |
| 375°F (190°C) | 20–25 minutes | Balanced heat, works well with sauces |
| 400°F (205°C) | 18–22 minutes | Best for juicy and fast results (my go-to) |
| 425°F (220°C) | 15–18 minutes | Fast cooking, best for thin and even breasts |
Always use a meat thermometer if you can. Chicken is safely cooked at 165°F (74°C) in the thickest part.
By Weight of Chicken Breast
The size of the chicken breast also affects how long it needs to bake. Bigger pieces need more time, while smaller ones cook faster.
In my kitchen, I weigh the chicken when I prep meals. It helps me avoid overcooking and keeps the chicken nice and juicy.
Here’s a table to guide you:
| Chicken Breast Size | Weight | Bake Time at 400°F (205°C) | Tips |
| Small | 5 oz | 15–18 minutes | Watch closely; cooks fast |
| Medium | 7 oz | 18–22 minutes | Most common size—great for meal prep |
| Large | 9 oz | 23–26 minutes | Pound slightly to help cook evenly |
Tip: I always check doneness using a thermometer instead of guessing by time. This one step has saved me from dry chicken more times than I can count.
Tips to Keep Chicken Breast Moist and Juicy

Brining vs Marinating
If your chicken breast often turns out dry, the fix might be in the prep. One of the best ways to keep it juicy is brining. Brining means soaking the chicken in salt water for 15 to 30 minutes before baking. This helps the meat pull in moisture and stay tender while cooking. I’ve used this method many times, especially when cooking in bulk, and the results are always more flavorful and juicy.
Marinating, on the other hand, adds flavor more than moisture. Marinades often include oil, lemon juice, herbs, or spices. While they won’t lock in juices like brine does, they do add taste and make the outside of the chicken more flavorful. For the best results, I sometimes brine first, then marinate—a double win for taste and texture.
Use of Foil or Baking Paper
Another simple trick to avoid dry chicken breast is using foil or parchment paper. Covering the chicken while it bakes helps trap steam, which keeps the meat from drying out. I use parchment paper pouches when I want soft, juicy chicken with no crispy crust. When I want a little browning, I remove the cover during the last few minutes of baking.
This method works especially well when you’re baking chicken breast with veggies or cooking it in batches. It helps keep everything moist and evenly cooked. Plus, it makes cleanup easier—always a bonus in my kitchen!
Internal Temperature Accuracy (165°F)
To make juicy baked chicken breast, you must cook it to the right internal temperature. That number is 165°F (74°C)—not more, not less. If you go higher, you risk drying out the meat. I learned this the hard way by relying on time instead of a thermometer. Once I started using a meat thermometer, my chicken turned out perfect every time.
Thermometers are cheap and easy to find online or at most kitchen stores. You just stick it into the thickest part of the breast near the end of the baking time. If it reads 165°F, your chicken is done and safe to eat, according to USDA food safety guidelines.
Why Resting Chicken Matters
Resting might sound like an extra step, but it’s one of the most important parts of baking chicken. When you take the chicken out of the oven, let it sit for 5 to 10 minutes before slicing. This gives the juices time to move back into the meat instead of leaking out.
I used to slice my chicken right away because I was in a rush—bad idea. The juices would run out, and I’d be left with dry pieces. Now I cover the chicken with foil while it rests, and the texture is much better. It’s a small change, but it makes a big difference in flavor and tenderness.
Baked Chicken Breast Recipe Variations
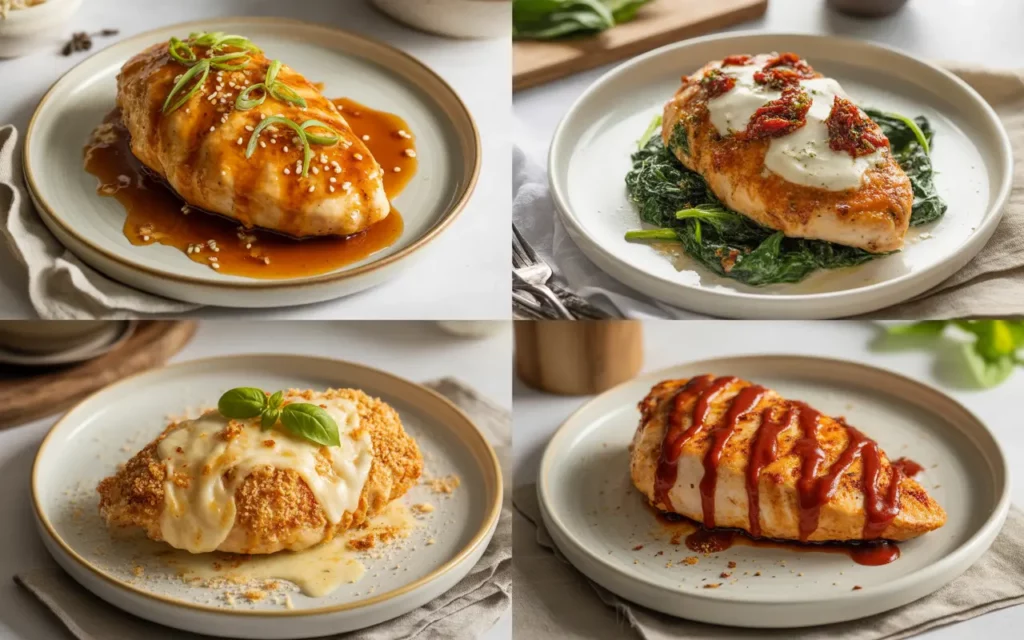
Honey Garlic Glazed Chicken
This is one of my favorite ways to bake chicken. You mix honey, soy sauce, garlic, and a little vinegar to make a sweet and sticky sauce. Just brush it on the chicken before and during baking. It gives the chicken a golden glaze and a lot of flavor.
I like to serve it with rice and green beans. The best part? You don’t need anything fancy—just stuff you probably already have in your kitchen. It’s tasty, simple, and perfect for busy nights.
Creamy Tuscan Style Chicken Breast
This recipe feels fancy but is easy to make. You bake the chicken with spinach, sun-dried tomatoes, garlic, and a little cream or yogurt. It turns into a rich, creamy dish full of flavor.
I use plain Greek yogurt to keep it light and healthy. It smells amazing while it bakes and tastes even better. This one is great when you want something different but still easy.
Baked Chicken Parmesan
Baked chicken parmesan is crispy, cheesy, and full of flavor. First, coat the chicken with breadcrumbs, parmesan cheese, and herbs. Bake it until golden. Then add marinara sauce and mozzarella cheese, and bake a few more minutes until the cheese melts.
It’s one of the first baked chicken recipes I ever made. It goes great with pasta or a side salad. And since it’s baked, it’s much healthier than the fried version.
Spicy BBQ Baked Chicken
If you like a little spice, try this BBQ chicken. Mix barbecue sauce with a bit of chili powder or hot sauce, then spread it on the chicken. Bake it until the top is sticky and a little crispy.
This one is great for lunch boxes or quick dinners. I love serving it with sweet corn or roasted potatoes. You can also use your favorite hot sauce to change the flavor.
What to Serve With Baked Chicken Breast

Low-Carb Options
If you’re keeping things light, low-carb sides are a great match for baked chicken breast. I often serve it with roasted broccoli or cauliflower rice. These sides are quick to make, and they don’t need much seasoning. Just a little olive oil, salt, and pepper do the trick.
Zucchini noodles are another fun option. They’re easy to spiral and cook in just a few minutes. I like topping them with lemon and garlic for extra flavor. These low-carb sides help make your meal filling but not too heavy.
Comfort Food Combos
Some nights, you just want a cozy meal. That’s when I go for mashed potatoes and baked chicken—a classic combo that always works. Add a bit of butter or gravy, and it feels like home.
Mac and cheese is another family favorite. My kids love it, and I love how easy it is to make. For something fresh but still comforting, try corn on the cob with a bit of salt and butter. It’s sweet, crunchy, and perfect with juicy chicken.
Fresh and Light Sides
If you want something fresh, salads and grains are the way to go. A simple mixed greens salad with lemon dressing goes great with any chicken flavor. I often throw in cherry tomatoes, cucumbers, and a sprinkle of feta cheese.
Couscous and quinoa bowls are also great choices. They’re light but full of fiber and protein. You can mix in chopped veggies or herbs to make them more exciting. These sides are great when you want a healthy meal that still tastes amazing.
How to Store and Reheat Baked Chicken Breast
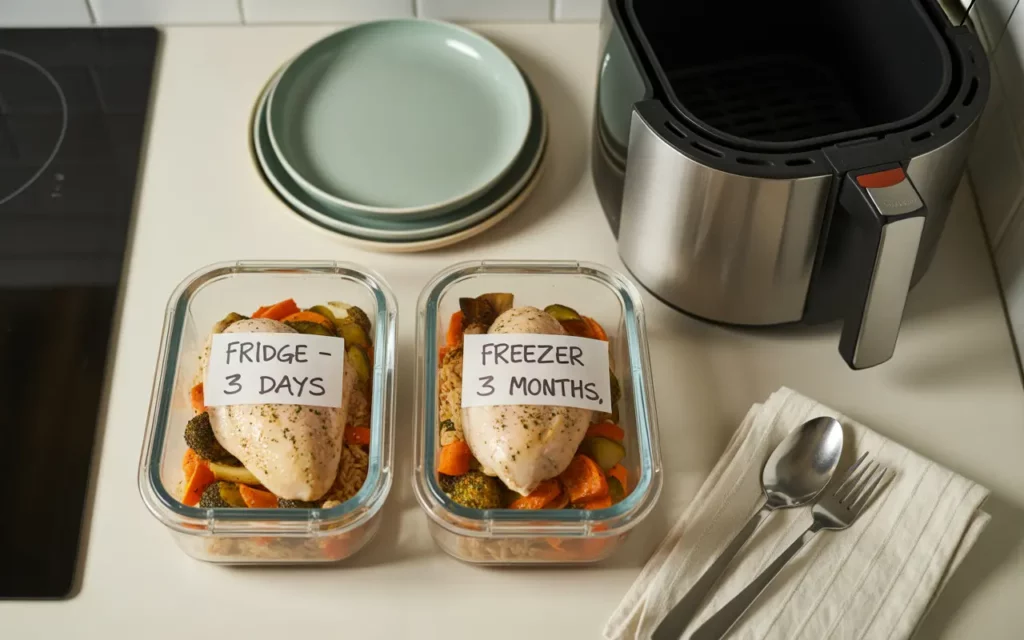
Refrigerator and Freezer Storage Tips
Once your chicken is cooked and cooled, it’s important to store it the right way. For the fridge, place the chicken in an airtight container and eat it within 3 to 4 days. I usually slice it before storing so it’s ready to grab for lunch or dinner. Always keep it on the top shelf to avoid cross-contamination with raw meat.
If you want to keep it longer, baked chicken can be frozen for up to 3 months. I wrap each piece in plastic wrap and then place it in a freezer-safe bag. Don’t forget to label it with the date! This has saved me so many times when I needed a quick meal but didn’t want to cook from scratch.
Best Reheating Methods (Microwave, Oven, Air Fryer)
Reheating chicken the wrong way can make it dry and tough. The oven is best for keeping the chicken moist. I reheat mine at 325°F (165°C) for about 10–15 minutes, covered with foil to trap the steam.
The air fryer is great if you want the outside to stay crispy. Just heat it for 5–6 minutes at 350°F. If you’re in a rush, the microwave works too—but add a splash of water and cover the plate with a damp paper towel to keep the chicken from drying out. I’ve tested all these methods, and the oven wins for best texture.
Using Leftovers Creatively (Wraps, Salads, Sandwiches)
Leftover baked chicken breast is super handy for fast meals. I often chop it and toss it into a salad with greens, cherry tomatoes, and a simple dressing. It’s fresh and filling, and I don’t need to cook anything extra.
You can also shred the chicken and use it in wraps or sandwiches. Add a little mayo, mustard, or BBQ sauce, and you have a quick lunch in minutes. One of my favorite tricks is mixing leftover chicken with cooked rice and veggies for an easy chicken bowl—great for meal prep and full of flavor.
Printable Recipe Card: Quick & Easy Baked Chicken Breast
Over the years, I’ve tested a lot of baked chicken recipes—but this one is the one I always come back to. It’s quick, simple, and works every single time. Whether you’re a beginner or someone who meal preps for the whole week, this oven baked chicken breast recipe will be your new favorite. I’ve made it so many times that I could probably do it in my sleep!
Feel free to print the recipe card below and stick it on your fridge. It includes everything you need—from prep time to the final step—so you never miss a beat. It’s also perfect for kids learning to cook or anyone who wants a healthy meal without stress.
Recipe Summary Box
| Category | Details |
| Prep Time | 10 minutes |
| Cook Time | 20–25 minutes |
| Total Time | 30–35 minutes |
| Serving Size | 2–4 servings |
| Main Ingredients | Boneless skinless chicken breast, olive oil, garlic powder, paprika, salt, pepper |
Ingredients
- 2 boneless, skinless chicken breasts
- 2 tablespoons olive oil
- 1 teaspoon garlic powder
- 1 teaspoon paprika
- ½ teaspoon salt
- ½ teaspoon black pepper
Optional add-ins:
- 1 tablespoon lemon juice
- 1 teaspoon Italian seasoning
- 1 teaspoon mustard or honey (for glaze)
Instructions
Step 1: Preheat your oven to 400°F (205°C).
Step 2: Pound chicken to even thickness (use a rolling pin or meat mallet).
Step 3: Brush both sides with olive oil.
Step 4: Sprinkle with garlic powder, paprika, salt, and pepper.
Step 5: Place on a baking sheet or in a dish.
Step 6: Bake for 20–25 minutes or until internal temperature hits 165°F (74°C).
Step 7: Let rest for 5–10 minutes before slicing.
FAQs (Frequently Asked Questions)
Is it better to bake chicken at 350°F or 400°F?
Baking at 400°F makes the chicken cook faster and stay juicy. At 350°F, it takes longer and might dry out. I always go with 400°F for best results.
How should I season chicken breast?
Use salt, pepper, garlic powder, paprika, and olive oil. You can also try lemon juice, herbs, or spices like chili flakes. Rub it in well before baking.
Why is my chicken breast always dry?
It’s likely overcooked or baked too long. Use a meat thermometer and stop baking when it reaches 165°F (74°C). Also, let it rest before cutting.
Can I bake chicken breast from frozen?
Yes, but it takes longer—around 35 to 45 minutes at 375°F. It’s better to thaw it first so you can season it well and cook it evenly.
Should I cover chicken breast while baking?
Covering it with foil keeps it moist. If you want it crispy on top, bake it uncovered for the last 5–10 minutes.
Conclusion
Baking chicken breast is easy once you know a few simple tricks. Pound the chicken so it cooks evenly. Add oil and your favorite spices. Bake it at the right heat and don’t forget to let it rest before cutting. These small steps help keep your chicken juicy—not dry. So, the next time you want a healthy meal, try baking chicken. It’s better than fried, and it tastes great. You can change the flavor, keep it juicy, and make it your own. Once you try it this way, you’ll want to make it again and again.